Sunday, June 12, 2011

Sammael, part II

I wish I'd taken MORE pictures, but it was a chore enough to get through this, believe it or not.  I did run through a bike as a test model, so I could work out where I needed to be with certain steps etc, and if what I was doing was right. I will certainly be painting one test model in the future before an entire unit - I learned a lot.
Next time I post, I will be showing the test model, and the step-by-step of the bike painting by using the two attack bikes I'm working on.  Onto Sammael.

After I did my test model, I went at the Sammael speeder with the wash mix I'm using for this.  I have no idea why, but I forgot to block in the bare metal areas with Boltgun Metal, so I had to go over those carefully then wash them again.  It was more difficult than painting the Boltgun Metal before washing as it was awkward to tidy up mistakes afterwards. I was painting the two other speeders for this army I was able to catch my mistakes with the Sammael model and get done what needed to be done on the other models before washing.


I also painted the red guns in before washing the black over the Boltgun Metal areas too, then highlighted those as well once I was done.  I think the most trouble I had was with weathering the exhausts - I'm still not happy with those.  Also getting the brush in to do the buttons and such on the dashboard.  I'm not that worried about a Golden Demon, so I didn't do them all.  The banner hanging just to the rear of the step on the left side of the speeder kept breaking, so I cut it off and found a resin purity seal that covered up the problem.  It looks a little off-kilter with the gubbins hanging off the right side only but it will suffice, I think.  I don't like too much ostentation on the models - they're on a battlefield, not a catwalk!

Not happy with the exhaust, but I'll live with it.

The book was painted "on the fly" using colours seemingly at random - I wish I'd written it down.  The cover was in a mix of Orkhide Shade and Camo Green, the red ropes were Blood Red washed with Mud and highlighted back up again with Blood Red.  Nothing spectacular.  I based all of the gold parts in Iytanden Darksun and used Burnished Gold and Shining Gold with a Devlan Mud wash.


I'm quite happy with the edge highlighting, considering I'd winged it on figuring out where it should go - it looks good more than being correct, I think!  By the time I get to the other two speeders from my other Ravenwing Battleforces I should be a dab hand! 


Thanks to Scott at S6 Engineering for making these fabulous flight stands.  They really are quite sturdy and definitely worth the wait.  If you've got wobbly Tau vehicles, I'd heartily recommend these bases for them. 


I've been playing a bit of a Doublewing list lately using some old bikes and stuff from the used army I bought three years ago.  My son will get those when I have all of this stuff done.  Learning the nuances of scouting and flanking, and when to drop the teleport homers and stuff has made the game more interesting.  Until next time, so long for now!

Thursday, May 19, 2011

Ravenwing - which black is the right black?

I've been really having trouble deciding which black to paint my Ravenwing.  Honestly.  There are so many blacks, and so many techniques for painting black.  I'm sure that those of you who have painted something black have struggled the first time to figure out the best way - for YOU - to get the thing to have some depth, yet still be... black.

I bought a variety of blacks - a couple of Vallejo varieties but they were just too grey. What I wanted was a colour that I could basecoat, then apply some highlight and wash with a Badab Black airbrush mixture and have it work.  I was at Imperial Hobbies the other day, wrangling my five year old son who seems dead set on getting Pokemon cards (you can't build and paint Pokemon cards, Jamie!) while at the same time looking at the various and sundry paints they have on offer.  They really do have an excellent selection.

I saw it.  On the Tamiya rack for $2.95 a pot.  NATO Black.  Apparently NATO has it's own shade of black.  It's not grey, it's just not an absolute black the way that GW Chaos Black is.  It's like the colour of black newsprint in bold headlines.  It's very interesting.  So I bought three pots and last night I sat down with the airbrush and went at it.  I used one Tamiya pot and got two Ravenwing battleforces painted, along with my Standard Bearer and his bike and my Chaplain and his bike.  AND Sammael's landspeeder.  Believe me - I JUST got them done, there wasn't enough to paint one marine left in the jar when I put the last model down.

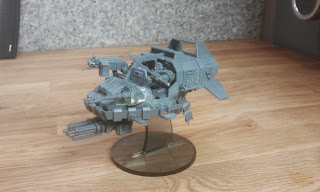
Went to look at them today after they'd dried out and.. I wasn't happy.  They were fuzzy. The same fuzzy as when the paint dries JUST before it hits the model but still sticks.  The same fuzzy you get when priming with Armoury Primer on the warmest most humid day of the year. Well... nearly.  Here's Sammael's speeder.

Sammael, master of the Fuzzywing...
The colour's great, don't get me wrong - I like the way it turned out.  My Dark Angels army isn't conventionally coloured and I'm happy with this muted tone.  Can black be muted? lol  It's just fuzzy.
Not to worry.  I'd had this experience when I primed four drop pods with Armoury primer and I applied the same solution.  I got out an old toothbrush and gave everything a scrub.  It flattened stuff down and actually helped define some edges for me so I can apply highlights properly.

Another basecoated Landspeeder

I went through and scrubbed the entire lot, one bike and one marine at a time.  Until I actually glue them in place I'm gonna have a time making sure they don't get mixed up - each marine was glued together in place then removed so I could paint the bike properly,

Left - Fuzzy.  Right - Scrubbed.
Can you see the difference there? It is better "in person".  In my haste to get stuff finished and get inside before the mosquitos ate me a live, I forgot the take a picture of the speeders after I scrubbed them.  D'oh. 
The next step will be to work out what I should use for a highlight, and if I should wash first then highlight with the original colour.  When I do wash it will be with Badab Black, some airbrush medium and a couple of drops of Future to harden the finish up a bit. Now I get to spend a week deliberating on that.  Make some suggestions if you like - I welcome them! :)


Monday, April 25, 2011

Sammael Landspeeder, part 1

I'll be attending the Ordo Fanaticus 40K team tournament in Vancouver, Washington in August.  I'm planning on taking a Doublewing list.  Partly for giggles, partly as motivation to get my Ravenwing finished, and partly as motivation to get my Deathwing command squad done too.

As I have four Ravenwing battleforces, I wasn't short of parts to make Sammael's AV14 Landspeeder of amazingness. I went ahead and ordered a barebones Landspeeder body from The War Store which suited my needs.  Of course, it is one of the older bodies.  Not a big deal actually.  I've built a couple and have figured out the foibles and niggles of assembling these "bloody things".


I think I've more or less worked out where I need to trim and sand to get the best fit possible.  Then I went to work with the Squadron brand green putty.  After that had dried and was sanded I did the fine work with Tamiya White Putty.  You can see the result above.  I should not be able to see the join once the primer is on.

The antenna doodad was awkward too and took a fair amount of filling.

One more thing - I HATE the GW flying bases.  I'm sure I'm not the only person on the planet who feels this way.  They give you a long stalk and a short stalk with the base, and inevitably the stalk snaps at one end or the other.  The other thing is that the model is so unstable on the top of the stalk and spins around and lolls to one side.  Crap.  They made an improvement with the ball and socket thing but even that wears after a while.

S6 engineering in the UK has a unique solution and it involves magnets.  It's secure too!  They're quite easy to assemble after some test fitting and filing.  I wouldn't recommend using a CA or plastic glue to assemble the base though as the acrylic did cloud up on me where I glued the magnets in place.  But you can't see it unless you pick the model up.  Meh.


Sammael was relatively easy to source the bits for.  I used the commander armour with the high collar and a power sword from the Dark Angels veteran kit. Easy peasy!  I won't put the hood ornament on it as I think they look silly.  The scrolls and such though will fit the model and as it will never come off the base, there's no problem with them hanging low.


Next blog I'll be talking about the Deathwing Command Squad some more.


Thursday, April 21, 2011

GW, thanks for the Grey Knights!

So for ages, I've wanted to build a Deathwing apothecary after drooling over the one in the codex since I bought it.
That one was kitbashed from the Terminator kit with a veteran head and some Apothecary bits.  I just wan't able to do my own conversion justice and longed for the day when I could actually get a Terminator Apothecary arm.

I love Grey Knight Terminators just for this reason!  They get an Apothecary in the box!  So I gave it a couple weeks and looked to the eBay bits providers to sell me some love.    Thanks very much to The Imperial Forge on eBay - they're in Woodstock, Ontario. Go check out their store! They made me happy.  Here's what I got for my $8.95 plus shipping.


Yes indeed.  That's what I got.  I wasn't bothered that I didn't get the head because it only works with a Grey Knight.  I put it together today.

I believe that the Grey Knight terminator bodies are bigger.  The lamp set had to be filed and shaped and then some filler added when I glued them to the back of my dudeman. Also, the left shoulder joint is bigger than regular Terminator arms.  I had to cut it down quite a bit to get the Forgeworld pauldron on without it springing off in a random direction.
Well... not really random - usually in the direction of the underside of my desk.  Nice.  And here he is.


The base is from Evil Mushroom Games in the UK. He's got some nice inexpensive bases and scenery bits there.  Quite a simple base - big flat rock for him to stand upon and do his thing.  The second picture was to let you see the filler I had to apply - I gave the rock a bit of a wash to make it less stark in the picture as they come very white indeed!

Next build is the Deathwing standard bearer.  I have the Warhammer Fantasy Empire General's standard with the hammer completely cut out.  I would like to install a sword in its place and use a piece of brass rod to run through the hand of the Terminator.  I'm still in a quandary over what to arm the dude with.  Standards give +1 attack to the squad but I'd like to use that to advantage.  If it's in an assault squad with Lightning Claws, that would be 5 attacks each on the charge which would be handy.

Tuesday, March 8, 2011

Second Strongpoint completed

I appear to be on a roll.  A chocolate swiss roll with a cup of tea would be fantastic about now actually, but I have no swiss roll and if I drink tea now it'll keep me awake.

Yes, after the feeling of accomplishment I got from getting the Damocles Rhino done (I'm still feeling smug, over a week later) I got down to brass tacks and cracked on with the second strongpoint, just to get it done, out of the way and playable.  Tableable. Oh man, what's the word?! Presentable, I suppose.

In a similar fashion to the first one, here it is.


Yeah, that doesn't make any sense now, does it?  No it doesn't. Except to say that this bastion is modular! I didn't just want four bastions the same and decided to make the second one a slightly different and changeable affair.  The base is the doublewide and you can see the turret to go with.  Then there in the top right corner is the tower piece with the door that lets you out onto the lower deck. You can do whatever takes your fancy.  The floors are flippable for mounting The Guns That Nobody Uses™. Spess Mahreen not included.


Yep.  I like.  I would like to build a larger one for giggles, perhaps using four or even six Bastion kits with multiple floors, but next project is to get my Fortress of Redemption finished.  I had thought about building it all one piece and mounting it on a bit of scenery but that would make transportation an issue so it'll be in pieces. Then after that I have an ambitious project involving a Skyshield landing pad, two Shrines of the Aquila and some random bits from the Imperial Sector box. Oh yes.  In the meantime, more pictures.  Until soon! :)


Sunday, February 27, 2011

Damocles Rhino completed

Really? Three months? Yeah... I know. The thing is - Real Life really gets in the way. As does my Tyranid Army which I really got into after the New Year. That's over on the other blog - Hive Fleet Limey.

And this poor fella. Awwww, bless. He's been sat, generally ignored. It's been like a mental roadblock. For ages I largely ignored it after getting it up together, once I'd finished painting the inside. Then I forced myself to paint the left door and get the wings done on the front and the other doors, as well as the dish and some bits n pieces.

Then I got to a point with my Swarmlord model where I am waiting for parts. I was sitting in the "den" today looking at it and decided "Right! Git 'r done!" And I did. Oh, you'd like to see a couple of pictures? Oh alright then.


Yes, there IS Dullcote on that.  Very strangely, I can't ever eeeeever get it to go dead flat.  I have a suspicion that the cause is the gloss (Painter's Touch from Home Depot) which is preventing "dead flatness".  I can't figure it out, but I am very leery of GW Purity Seal.  IMHO, it's shite.  I almost lost a couple of RH1N0s a while ago cos of that stuff frosting very badly indeed. Dullcote saved them. And we move on.


The wings on the doors were painted first.  I used a basecoat of Charandon Granite on the stone circle. As the wings were covered in Orkhide Shade from the basecoating I decided to use that a little, and just overbrushed with a thin coat of Codex Grey, missing all the cracks then painted the feathers individually with P3 Frostbite.  The wings were washed with a mix of Badab Black, Future Polish and water in 3:1:1 quantity. Let it dry, did it again. Then I highlighted the feathers with P3 Menoth White Highlight, washed again then did the tips with the white again.  The same was done for the front panel of the vehicle.  The sword was just done with some Boltgun Metal, washed with black.  Then some Shining Gold washed with Devlan Mud.  The gems were just painted in with GW Red Ink.  Yes, I know that missed one! ;)  Skull was Deneb Stone washed with Mud. 


This door was done in quick time.  The wings were bascoat of Granite and drybrushed Codex Grey, washed black. The "REPENT" scroll was based in Deneb Stone (love that colour). The robe was P3 Menoth White Base (basically Bleached Bone), washed with Mud. Very easy. I always paint the recessed panels on my tanks like that.  Just breaks the model up nicely, I think. 

I'm certainly most proud of the crew.  That was what I did first, as you may have read in a previous entry entitled Late And Lateability (I was on a Blackadder kick).  I look at them all of the time, and this model is in my display case with the lid off and the back door down.  I love it.  


I love what this unit can do, and so cheaply too! The gaming club is (not) enjoying a hiatus while we search for somewhere else to throw dice at each other.  I may have mentioned that.  I'm definitely looking forward to fielding this innocuous chap to assist my Deathwing and drop a cloverleaf on some unsuspecting troops. As soon as I had finished the Dullcote, I grabbed my second Strongpoint and I've started detailing the bastions.  Pictures as soon as they're done.  And before the end of May.  I promise.