
For my first attempt at weathering, I'm happy. The longer aegis defense lines were weathered with that damned awful GW stippling brush. I've decided that I hate it. They took forever to get the paint to stipple anywhere near like how I wanted it, and it was still too thick for my taste. Then I got out an old blue GW drybrush and the Forgeworld Black Soot weathering powder. I basically stippled the powder into place on the blast marks with the drybrush. Easy. Filled the holes with badab black. Fixed it in place with Dullcote. I did notice that the dullcote tended to make the powder... run? a little. Perhaps I was applying it too heavily.


The Guns That Never Get Used, as I like to call them turned out better than I expected. I basecoated the "metal" portions of the weapons with Charadon Granite then drybrushed BGM and washed with Badab Black. Not too shabby. The drums on the autocannons were based with Iyanden Darksun, drubrushed with Dwark Bronze and washed with good old Devlan Mud.


I have started constructing the other Strongpoint. I wanted to make it like the "doublewide" bastion that is part of the winning entry in GW's recent scenery contest for the Realm Of Battle board. The only thing I didn't like about that building was that there was no door out to the lower... mezzanine? Where the Chapter Masters drink their root beer and watch the battle? So I took the side tower section and cut off the firing slot for the heavy bolter and glued on a door that I'd cut out of a piece from the Imperial Sector building set. I don't think it fits in precisely with the style of the building, but it serves to show its purpose.
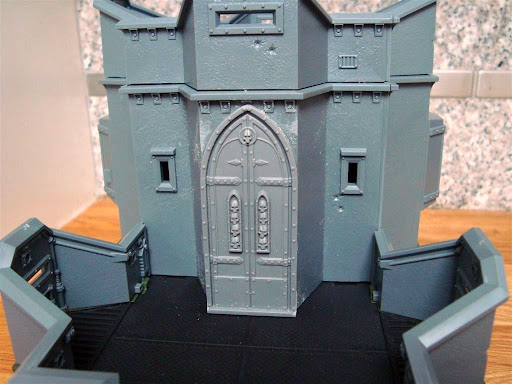
I built this second bastion to be modular also - it did involve buying bits from eBay for completion's sake. Should I choose to, I can remove the tower section, disassemble it and just build one single floor doublewide bastion. I bought more parapet sections from a bits seller on the eBays so I can just have that pop onto the doublewide section as required. The floors are removable and will be fitted to "work" as required. I glued the large doors to either end. Makes sense.


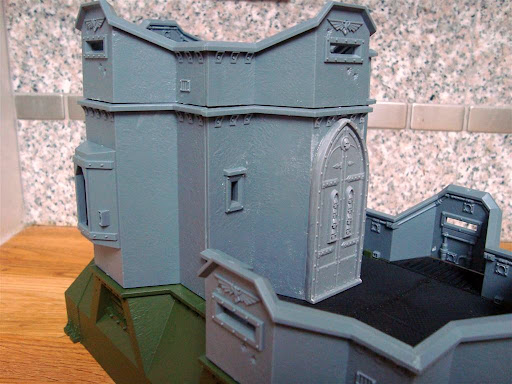
Spot the oops in the picture on the right. Oh alright I'll tell you. I glued the panels with the firing slots adjacent to each other on the upper tower section, rather than opposite each other. Luckily the plastic cement allows a fair chunk of drying time so I was able to pry the section apart and correct it.
For those curious, here's a closeup of the lower section with the Flames Of War spraypaint applied. The coverage is good and it's not too thick, but as I said you need to take care when getting it into the nooks and crannies so you don't overdo it.

Other guns and such will be glued on when I next work on this building. I really MUST finish my Damocles Rhino.
Honestly...
Honestly...
Links!
I Never Thought That Was My (Imperial) Strongpoint - WIP part 1
Forsaken Games, New Westminster BC (the club's FLGS and charming host)
Imperial Hobbies, Richmond BC (where I got the paint from)
The Army Painter's spray can line
Flames Of War spray can line
Great work so far! I like the door conversion especially. Looking forward to seeing the final painted product.
ReplyDeleteThanks mate! I look forward to getting it done so I can finish my Rhino lol
ReplyDelete