Sunday, November 28, 2010

Rhinopredaback!

Hey heyyyy! (Insert Krusty Brand laugh) Lots of Real Life stuff happening, and the 40K has taken a small step to one side of late.  A number of times I haven't been to the club on a Friday and the focus on "getting it done" has been lost for various personal reasons.

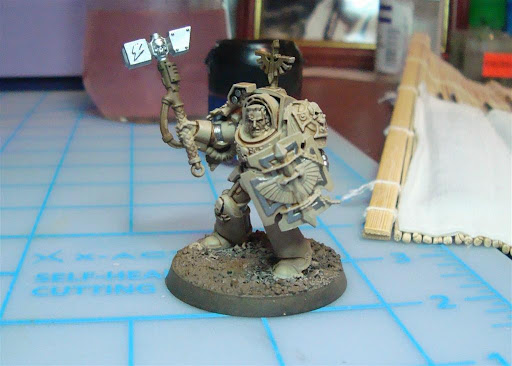
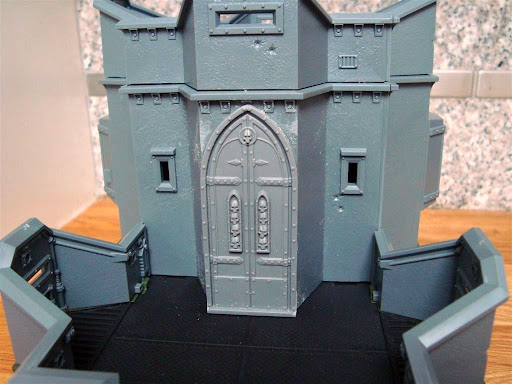
I have done SOME work on finishing the Damocles Rhino - working toward getting the exterior detail finished.  I'm hoping to get a lesson in painting wings by my good friend Nick Daniels (go see his Blood Angels work) so I can get to work on painting those Forgeworld doors all lovely and that.

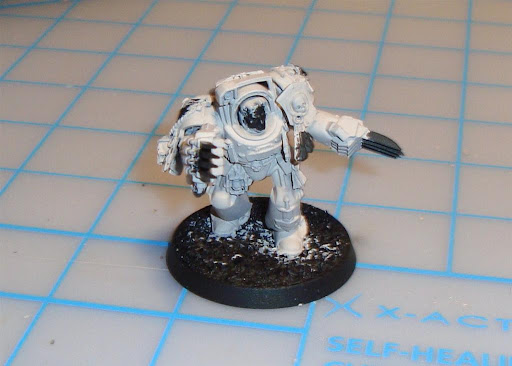
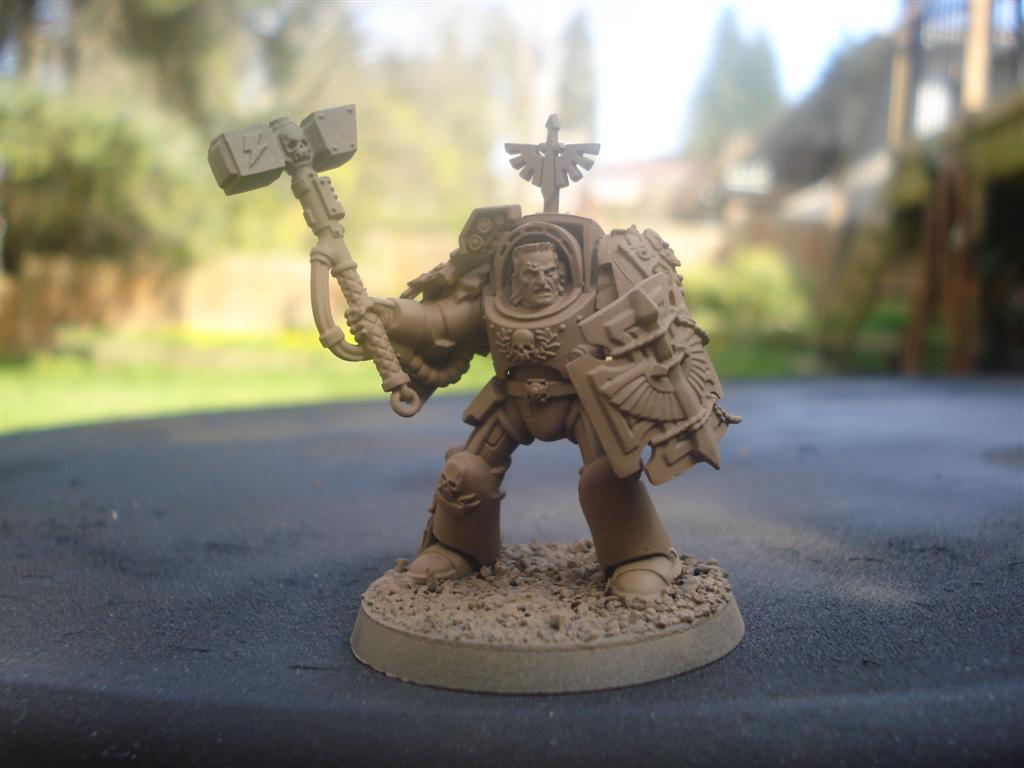
In the meantime I bought a Predator.  Wasn't a planned purchase (like most of my army, it seems).  I don't see a lot of them in use to be honest, and part of the reason I bought it was to fill a hole in a Battlefoam tray.  Another part of the reason was my apparent OCD for building RH1N0 chassis vehicles.  The rest of the reason was THIS BLOG (that means you click on the link there).  I just stumbled across it one day and was so impressed I had to try it.  Here's my effort.

I didn't have the exact same size magnets that Munky had for his blog... I think mine were a tad thinner.  For attaching the Rhino doors, I used pieces of sprue that had been shaved down the correct amount.  If you look at the back of the Predator sponson mounts you'll see that I stuck on thin pieces of plastic which I sanded down until they were thin enough that with the magnet on, the sponson mounts sat in the recesses and didn't wobble about.  The magnets are very strong, and I need to use a lever of some kind (like a #11 blade) to pick the Rhino doors out!


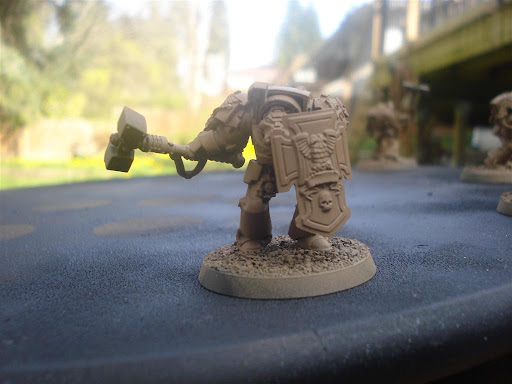
While I was working on the sponsons, I found Munky's blog to be of great help.  Not a specific set of instructions per se, but a great guide.  The colour-coded "carve here" pictures were easy to follow.  I still managed to carve a chunk out of my left thumb though.  I don't know why, it wasn't in the instructions.

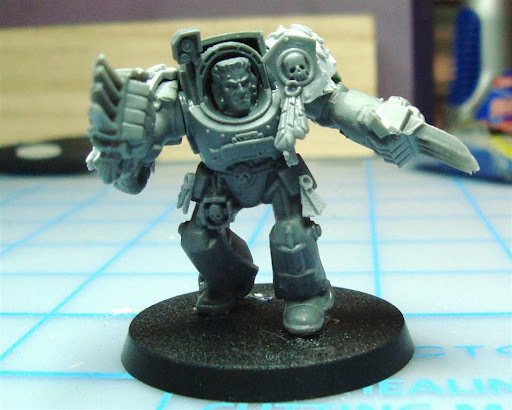
The addition I made was to put the aquila on the back door.  Yes, I know Forgeworld make one.  I had one but the hinge peg broke off.  So I carved the aquila out of the resin, sanded the back down until it was thin enough and stuck it on the door.  This door must have been through the moulding machine when the servitor was on the fritz as it had low spots in it.  Again the old useful Tamiya White Putty came to hand. 


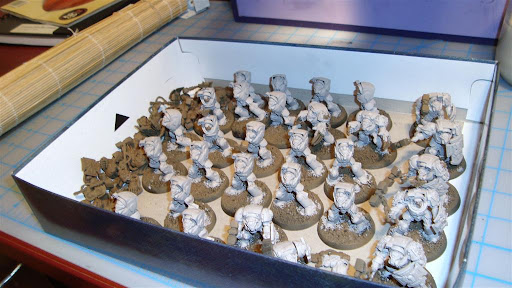
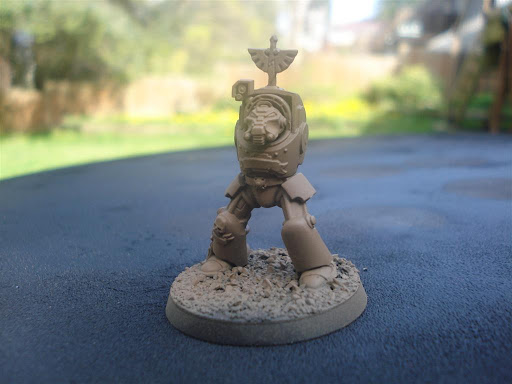
A worthwhile project on the whole, I think.  Munky's guide is definitely the best one that I found for this.  It's now in the line-up to get painted! One day I'll get them all done... ;)

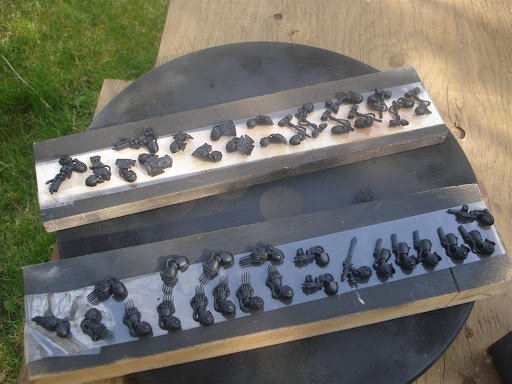
Meanwhile - here's a slideshow!


Saturday, October 30, 2010

Strongpoints, part 3

I received some more of the roof pieces from wyrmholehobbies, an eBay bits seller.  Quite reasonable at $6 for 8 pieces plus shipping  and it helped me create the further effect with the lower level "doublewide" that I wanted to do.  I just like to mix it up a bit and give folks choice when they're using stuff for setting up a game.  The work the White Dwarf team did with the bastions and COD buildings on the back of the latest (Dark Eldar release) issue makes me drool and go crazy. But I shall stay my hand from my wallet cos it's almost Christmas and wives like presents too.  And I don't like sleeping on the couch.

Usually the bastion pieces are pretty easy to glue together.  The lower level pieces lock together side by side no problem.  The tower pieces , I imagine exhibit the same small limitation I found with the roof bits. To assemble them side by side I had to cut a small piece off, then put a small piece of sprue in the back to hold them together.  Like so.


I just used a pieec of sprue, as I said.  And cut it down and filed it flat.  Still doesn't look THAT great.  I'm not looking for a seamless finish here, as they're just supposed to be stamped, pre-fabricated plascrete buildings. Or some such thing.  I bought a tube of Tamiya's white putty from an LGS.  It's consistency is like toothpaste, but not grainy - not as grainy as Squadron Green Putty, which while useful and sands down nicely once it's dry, can be quite brittle.  I filled in the gap, so:


Let that dry, sanded it flat and did the thing with the assembly. Sprayed it with the Soviet Armour and drybrushed with the GW Rotting Flesh as per usual.  I painted up the floor panels using the same method as last time and  here you can see another configuration of the current project. 


Yes, that's my son's tactical marine from the Alpha Legion.  He's okay, he's a loyalist just waiting for the articificers to repaint his armour in the Blackshield way.  Or IS he a loyalist...?


Links
Imperial Hobbies, Richmond BC (where I got the putty from)
Wyrmholehobbies - eBay bits provider. 

Saturday, October 16, 2010

Strongpoints, part 2

Finally! Something to show you all.  I got the first strongpoint finished, with the exception of the communication array things.  I'll do them later.  Those'll be nice objective markers, but that's about it to me.  I finished the first one about two weeks ago, but took them to the club's storage at the FLGS and forgot about photographing them.  D'oh.

For my first attempt at weathering, I'm happy.  The longer aegis defense lines were weathered with that damned awful GW stippling brush.  I've decided that I hate it.  They took forever to get the paint to stipple anywhere near like how I wanted it, and it was still too thick for my taste.  Then I got out an old blue GW drybrush and the Forgeworld Black Soot weathering powder.  I basically stippled the powder into place on the blast marks with the drybrush.  Easy.  Filled the holes with badab black.  Fixed it in place with Dullcote.  I did notice that the dullcote tended to make the powder... run? a little.  Perhaps I was applying it too heavily.


The Guns That Never Get Used, as I like to call them turned out better than I expected.  I basecoated the "metal" portions of the weapons with Charadon Granite then drybrushed BGM and washed with Badab Black. Not too shabby.  The drums on the autocannons were based with Iyanden Darksun, drubrushed with Dwark Bronze and washed with good old Devlan Mud. 


I have started constructing the other Strongpoint. I wanted to make it like the "doublewide" bastion that is part of the winning entry in GW's recent scenery contest for the Realm Of Battle board.  The only thing I didn't like about that building was that there was no door out to the lower... mezzanine? Where the Chapter Masters drink their root beer and watch the battle?  So I took the side tower section and cut off the firing slot for the heavy bolter and glued on a door that I'd cut out of a piece from the Imperial Sector building set. I don't think it fits in precisely with the style of the building, but it serves to show its purpose.


I built this second bastion to be modular also - it did involve buying bits from eBay for completion's sake.  Should I choose to, I can remove the tower section, disassemble it and just build one single floor doublewide bastion.  I bought more parapet sections from a bits seller on the eBays so I can just have that pop onto the doublewide section as required. The floors are removable and will be fitted to "work" as required. I glued the large doors to either end. Makes sense. 


Spot the oops in the picture on the right.  Oh alright I'll tell you.  I glued the panels with the firing slots adjacent to each other on the upper tower section, rather than opposite each other.  Luckily the plastic cement allows a fair chunk of drying time so I was able to pry the section apart and correct it.

For those curious, here's a closeup of the lower section with the Flames Of War spraypaint applied.  The coverage is good and it's not too thick, but as I said you need to take care when getting it into the nooks and crannies so you don't overdo it.


Other guns and such will be glued on when I next work on this building.  I really MUST finish my Damocles Rhino.
Honestly...

Links!
Forsaken Games, New Westminster BC (the club's FLGS and charming host)
Imperial Hobbies, Richmond BC (where I got the paint from)
The Army Painter's spray can line
Flames Of War spray can line

Tuesday, September 28, 2010

I never thought it was my (Imperial) Strongpoint...

I've had two Imperial Strongpoint box sets under my table in the shed for a while.  I haven't had much motivation to get them completed, since my 300 sq ft workshop is a bit of a mess.  The roof was replaced recently as it leaked, and all of the drywall (plasterboard for you in the UK) needs replacing in one corner cos it went mouldy from the water.  And it's full of office cube pieces.  Don't ask. The workshop will someday be turned into a more useable room, and I'd got these strongpoints to build for the table that will live in there. They're unwrapped so I couldn't return them to GW for something else.

Since A Club moved into Forsaken Games, the Motivation Gnomes have been whispering in my ear and I decided to crack one open and get it painted up.  For ages the question which has been at the back of my mind has been "what colour?!".  I have been loathe to prime them then crack out the airbrush because it would take FOREVER and use a lot of Catachan Green, or whatever small pot colour I chose.  I started looking at stuff in the paint department at Home Depot, to no avail.  The Painter's Choice greens I was interested in were satin - semi-glossy.  Not what I wanted.

Then The Army Painter came out with their line of coloured primers and my "Wooo!" light went on.  They really are damned good, and my friend Doc had decided to use their bone paint when basing his nids (I'll be doing the same thing).  They look great, by the way. In their own label range, however I just couldn't settle on a colour I really liked.  Then I noticed that The Army Painter also makes the sprayable primers for Flames Of War.  They make colours that are almost pigment perfect for the various armies in the game.  I chose the colour for painting Soviet armour as a base.  Looks foresty enough for me without being garish.

Took it home and started spraying the two bastions and three Aegis Defense Lines I'd just constructed.  I have to say that the coverage is really good in most areas on the first coat.  You have to be careful when getting into corners and stuff that you don't overpaint.  If you need to, you should do a few light coats to get the detail done without obscuring it - the same as spraying anything really. The only "real" complaint I have is that one can isn't enough for a whole Strongpoint set! lol

I wish I had a picture of what the bastions looked like after I'd just painted them with the FoW paint, but I neglected to take some.  When I do the next Strongpoint kit, I'll remember to do that.

Highlighting was very quickly (disturbingly quickly!) decided as drybrushing with Rotting Flesh.  Did it on one defense line piece at first and I was happy immediately, so off I went and did the whole thing.

Some pictures - work in progress


You can see that not all the details are in yet.  The guns and lines are barely usable on the table top right now according my my standard anyway, but if I don't get these bastions completely done in time for the weekend's tournament then I won't mind too much. BUT they WILL be finished! I need to drill out the heavy bolters and paint the door on the pictured bastion.  The other one only has the skulls detailed right now.  The rest will be done one evening this week if I can get to it. I painted the Aquilas on the battlements and on the door here with a 50/50 mix of Deneb Stone and Skull White, thinned down with water and retarder - it helps the deneb stone flow and let me do several layers.  The skulls were just the same retarded Deneb Stone and Devlan Mud (instant talent!)

When I went back to get the second can of Soviet Armour I asked Imperial Hobbies to get me a can of the German Panzer paint, which I will use on my Fortress Of Redemption.  Eventually.

More pictures of this side project as they come.  The Damocles Rhino got sidetracked AGAIN.  Throne...

Linky corner
Forsaken Games, New Westminster BC
Imperial Hobbies, Richmond BC
The Army Painter's spray can line
Flames Of War spray can line

Monday, September 20, 2010

Nids and Nidability

Hey.  What's this?! There's not a single Calibanian in that picture.  Nobody's wearing robes, nobody's keeping secrets. What the hell?!

Ahhh, worry not dear friends. It's a side project.  I am attempting to build a Tyranid army without paying full price for any model.  Or at least, the majority of them. It's a social experiment tailored to size, to paraphrase the immortal Roy Harper.

It started when I got a free Fortress of Redemption.  I won't say where or how, needless to say I got it legally and for free. Which was nice.  Except I already have one.  So I took it to my local GW where they exchanges it for me as it was still sealed and they didn't have one in stock.  I ummed and aaaahed for a while, resisting the temptation to get MORE Spess Mareen stuff (even though a third Ravenwing box was calling my name) and picked up the Tyranid codex and Battleforce. Paid a measly fourty dollars or something in difference and off I went.  People were agog

"Chris is doing nids!" (And all at the same time! F'nar!)
"Chris has dropped his Dark Angels!" (which I will deny at the top of my lungs from the highest peak)
etc.

So I got the battleforce. Put that together.  Hmmm need more stealers.
I love Craigslist.  I love eBay.  Now I have 40 2nd edition Space Hulk genestealers.  Unpainted. I have more spore mines than I can shake a stick at.  I got more gaunts and a hive tyrant at discount and bought gaunt bodies and heads from Hoard O'Bits to make more gaunts using the arms left over! Then I got three warriors for $20 which were unassembled and unwanted.  That would make my warrior brood and Prime.
OMFG - I looked at all of the niddiness I had amassed and was... a little overwhelmed.  That's a hell of a lot of dipping to be done in the near future.  Possibly a whole liter of Minwax will be used.

And I did it again today.  Craigslist, you slut. I answered her call again today and got:


9 stealers with rending claws
3 termagaunts with devourers
2 termagaunts with spinefists
21 termagaunts with fleshborers
6 hormagaunts
1 base of rippers
10 spore mines
1 old Zoanthrope that needs basing somehow
1 old (smaller) hive tyrant (which will now be my Tyranid prime)

Not cleaned of flash, poorly primed and some horribly painted. $25.

I'm off to buy some Simple Green to give them a bath.  Really, they're horrible.  It looks like a certain local Howling Griffons player painted them. Yikes.

I may start a sub-blog to cover the creation of my bug army, or maybe not.

Friday, September 17, 2010

Late and Lateability

Oh Throne...

Yes, there has been no updates to my blog of oooodles of time.  Fact of the matter is I have just been too plain busy with stuff and haven't really had the bandwidth to sit and compose something for you all to read and enjoy.  I could have posted something for you to read... but you may not have enjoyed it.  A-ha! ha! ha...

I've been trying to do Real Life™ which is always fun, as well as moving A Club to a new home.  That was a big distraction, but now it's done.  A Club now has a new home at Forsaken Games, which is an awesome FLGS run by Rick and Kath Misiurka.  They do allll kinds of stuff from Munchkin to LARP.  Rick has history with GW, so he supports Warhammer in all it's flavours.


I was off work for six weeks on Workman's Comp after wrenching my back, which hasn't been so bad.  It's been frustrating in that all the home projects I could have tackled during that time off were of course bound to be hard on my back, yet I managed to get a bunch of nids built and a second Ravenwing box built and primed I also managed to add an Apothecary and Standard Bearer to my Ravenwing.  Pictures of those will be popping up as and when I get round to painting them.

Most importantly I finished the Deathwing models that I started for the epic fail that was the Paint Or Die! project.  It was a hard slog, to be honest.  Some days I just couldn't find the motivation to paint the same things over and over again but I didn't let myself paint anything else until they were done.  Here's a pretty slideshow - I love Picasa!!


What I'm most proud of is the Belial model with the lightning claws. I put a fair chunk of effort into it with the Forgeworld bits and the extra time and everything.  To spend so much time on a character model is really important, as it's often the centerpiece of your army whether that's from a gaming or display perspective.


Now that they're all finished, I got to work on finishing a project that's sat in the box since last June.  My Damocles command Rhino. I built it with the Forgeworld doors and front plate.  I did buy the Rhino back door but it was very warped and one of the pins broke off.  I wanted the door hinged for display because it really would be a shame to spend so much time on the model and not be able to see the interior very well, so I ended up just using the original door.

Today I finished painting the interior and clearcoated the crew.  I glued them in, then glued the side on. Once the glue is dried, I'll glue the lid in place and start work on the outside.


I'm moving forward with the Rhino fairly quickly.  I'm excited to get it finished as it's my first dedicated Imperial Armour vehicle.  Sure I have Mortis Pattern Dreadnought arms, but they're just a swap-in.  This was bought FOR Apocalypse games. More pictures as the painting progresses.  Or maybe you'll just see a picture of the finished model in three months lol

Wednesday, June 2, 2010

Magnets and Magnetability

I'm taking a momentary break from the Deathwing, simply because I don't seem to be able to put a large enough block of my time into getting any real amount of painting done, so I'm farting around with Assault Marines right now.  


I have 20 of them still unprimed, with no backpacks attached.  I was just planning on attaching the backpacks after I'd applied the shoulder decals, as the backpacks sometimes get in the way. I hate cutting up decals to fit around stuff as I tend to ruin them, which doesn't make me smile.  I like things that make me smile. 


I'd read some nifty stuff about running 10 Assault marines in a Land Raider.  LR trundles up and does it's shooting.  Next turn the Assault Squad inside  jumps out with their chaplain and go nuts on anyone who happens to be nearby.  


DA Codex, page 34: Assault Vehicle; Models disembarking from any access point may launch an assault on the turn they do so.


See? I like things that make me smile.  A friend of mine said to me "Why don't you just use Terminators?"  Well, I could, but five Terminators with lightning claws, and their Interrogator-Chaplain cost 360 points. I'd get 19 attacks on the charge, and Litanies Of Hate to re-roll missed hits on the charge.   An Assault Squad of 10 Marines (Sarge has Power Weapon) with their Interrogator-Chaplain would cost me 370 points, and I'd get 25 attacks on the charge.  Okay, the Termies get a better armour save and an invulnerable save. Big whoop. Five extra models to spread wounds among is more gooder.  Also, Lightning claws get to re-roll missed wounds.  BUT you have to hit them first. There are checks and balances, but I honestly like the chance of having another round of combat to go in my favour more than losing five terminators in a really bad roll of Yahtzee...


I started looking at the ways to magnetise.  I have 3mm x 1.5mm magnets from KJ Magnetics.  They are a good size and fit well in this scenario.  I decided to place one in the marine's back, and one in each of the backpacks.  I have to be very careful in this process to ensure that all 20 marines and all 40 backpacks have their magnets oriented correctly.  One magnet the wrong way round will ruin my day quickly.  


3mm is just a bit smaller than 1/8", which is about the size of the holes already in the backpacks.  I cut the button off the back of the marine, smoothed it down and drilled a hole into the back of the marine, about 2mm in. 


Sorry about the blur, a shaky camera moment!  I also had to drill down into the regular backpack to make the hole wide enough for the magnet all the way down.  Then I inserted the magnets into the assault jetpack and the back of the marine, covering them with greenstuff.  When the greenstuff is dry, I will sand it flat. That will help to prevent the magnets from pulling each other out.  I couldn't drill down far enough for the regular backpack magnet to be greenstuffed in, so I just superglued it. 


Once everything is dried I'll sand it all smooth and hopefully the results will be seamless to the naked eye of the everyday tabletop player.  Definitely not worthy of a Slayer Sword or what-have-you, but it'll save you some money and give you more scope for what to do with that Fast slot on your FOC.


Links to related subjects
Space Marines Part 1, Part 2, by All Things 40k
Rare Earth magnets by Dwarf Mine
Magnetic backpack/jump packs at Heresy Online


Saturday, May 29, 2010

Life is what happens when you're making other plans...


Oh.  Mygod.   The Paint Or Die project is officially a failure.  Life really did conspire to trip me up on this one!  BUT, I will carry on with the project, and perhaps just rename it Paint Or Not.

The Terminators are making progress, or rather I should say that I am making progress with them. Worked on the first coat of red on the red bits.  Red Gore, which will be followed by a diluted purple wash, drybrush and highlight of some kind.

The Ravenwing is still in the box, waiting for the first coat.  Since I just got a Ravenwing tray from Battlefoam, That's to one side for a while until I can get other projects finished, then I'll build a second set and paint them all together. .

The other thing that's getting in my way is... Warhammer 40,000. Very odd, yes.  I just took over the running of a private gaming club called A Club.  That's the logo I came out with, redesigning an older version.

We have gaming space in a warehouse that`s been decked out specifically for the purpose.  Many tables, TONS of excellent scratch-built scenery, a big ass TV and blue-ray player, a hot dog machine and good camaraderie.  Visitors note after spending an evening that they notice no rules lawyering, no arguments and no bad feeling.  And that makes me glad because people just come to have fun, play a game and enjoy the company of other like-minded individuals.  I think that a lot of that comes from the fact that we only allow members over the age of nineteen. N-n-n-n-n-nineteen.

What else do people like when they come to A Club? Thor's 65000 point mechanised Guard army.


Enough said.

Sunday, May 2, 2010

Line and Lineability

Yeah, alright. I changed the scheme again.  Well... I tweaked it. I realised that I do have a slight shake to my hand when I do fine work, especially when it's repetitive.  I couldn't imagine lining 30 Terminators with brown ink and having them all neat and tidy, so what I ended up doing was doing the brown lining then dry brushing with Deneb Stone for the rest of the army.

Don't get me wrong, I'm satisfied with the way the first squad look, I was just playing it safe. I mean - who wants to go and re-do 30 Terminators? Not me! lol.  But seriously folks, painting this number of troops at once is kind of tedious to me, as much as I will love the finished result, and what the finished result will do to my opponents mwuahahahaha!

Here is Belial from the back with the Forgeworld vehicle icon that I applied, with the Deneb Stone drybrushing also.  The icon's not too big and it will help to pick him out of a crowd - he is just a Company Master and not a freakin' Primarch so fancy isn't the name of the game here.


So once I spent four evenings lining and drybrushing, I've started on colours that aren't brown.  I'll be showing Belial in his various stages as I go, and other stuff just as I do it.  You won't always see progress on the same model, but they'll all be at the same stage.

So for the flexible joints in the armour, "hinge points" and cabling between the back of the greaves and the pauldron I'll be painting in with Boltgun Metal then washing twice with Devlan Mud.  I MAY go and do a wash of thinned black afterward.  Dunno yet.  Comments and suggestions welcome!


The hammer head and the shield detail are Chainmail, as will be blades on Lightning Claws.  I'll explain guns when I get to them and have photos available. I'll wash this with a thin blue, then a thin black to bash it down, then highlight with Chainmail and Mithril Silver. I don't like to go for the funky power effects - I'm too busy dammit!

Farting around with Deathwing insignia, Belial is the test subject (after all why put your men through something if you won't do it yourself?), and I've started with a red gore undercoat, which will get a thin purple wash to lay down the shadow on the FW stuff - being VERY careful not to get it on the bone paint. I'll have to get some purple wash tomorrow and go at it.


Saturday, April 24, 2010

Wash and Washability

I took a risk today and it paid off.  I've been really struggling with how I was going to shoot 30 terminators with Gryphonne Sepia wash and have it look good. Also, another thing occurred to me - if I lay the arms down on tape to wash them, they'll not look right when they dry, because of their orientation. And the fact that I would have to let them dry before flipping them over to wash the other side.  Yep.

A character by the name of Myrmidon on the Usenet group rec.games.miniatures.warhammer suggested to me that I try attaching the arms with Play-Doh.  It's a water based dough so it doesn't stain and cleanup is easier.  This dough gives you less chance of d'oh!  Waddya know, it works.  A couple of times it was awkward - perhaps there was some oil or something on the surface of the model but eventually the ones that needed to be removable were held in place with Play-Doh.  Arms that were positioned in such a way that didn't obstruct detail were glued on.

How to wash, how to wash, how to wash... I really battled with this and the risk was related to the mix.  I had bought some Liquitex Airbrush Medium to mix with the Gryphonne Sepia, but when I mixed a test batch it just didn't cover and dried weird. So I just did what I usually do - I thinned it with water and added a small blob of dishsoap to break the surface tension.  Shot it through the brush and they didn't look too bad at all!

After they'd dried I dry-brushed the Belial model and a squad with Deneb Stone, then hard lined the Belial with brown ink.  I intend to throw a bone glaze over the model tomorrow to bring everything down a tad and tie the hard-lining in a bit.  No pictures today cos my battery's dead.  Stupid battery...

Wednesday, April 21, 2010

Paint! Or Die! Part 3

I managed to get some time to sit and do the Deneb Stone portion of the basecoat on the Terminators tonight.  The simple Belial model for the challenge with Lightning Claws started life on this stage in black primer.  I decided to paint the Stone on this from black purely as an exercise to see how it would differ from those based with Graveyard Earth.  The brown does warm the Stone up a bit, but I'll continue painting Belial as is.

I made myself a wet pallet for this, just to keep the paint from drying out while I was mass painting. I took a pot of Deneb Stone and added a blob (no real measurement done here folks!) of Golden Additives retarder (not the whole schmear though, you never come back from full retard) and a few drips of water.  I guess the mix was 2 parts paint to 1 part retarder and 1 part water.  That's how I'm keeping it in the pot.  As I transferred it to the wet pallet I'd drop a brushful of paint water onto the pallet too. I would then liberally splosh the thinned but by no means less potent mix of Deneb Stone onto the models.  I'd say that by now it was the consistency of skimmed milk, but I didn't want to go out to the shed to load up the airbrush.


I'm in a quandary about what to do once the loose weapon arms all have their doses of Deneb Stone.  I'm unsure wether to glue the arms on and then apply the wash, or just tape the arms down as I did for the first basecoating and then wash.  The things hampering my decision are:

1. If I glue the arms on now, detail will be fiddly.
2. If I don't glue the arms on, the wash may not flow in the right manner when applied.

I will be applying a thinned Gryphonne Sepia wash with the airbrush, with a SMALL amount of flow improver added to get it moving right into the cracks.  I'm also considering buying some Golden airbrush medium to help me with this task.  Apparently at a low pressure the wash will work as if brush applied when used with such a product.  I hope so!

Other links
Top Painting Tips by Ron
40K Online - Topic: Using Foundation Paints in an airbrush?

Sunday, April 18, 2010

Forgeworld Dark Angels vehicle icons

I bought some of the Dark Angels icons in December while I was at Warhammer World.  I'm just getting round to using them now and I have to say they're not very good!

I'm building a Belial for the Paint Or Die to make it a legal list.  No greenstuffing or anything, just using Forgeworld icons and shoulderpads.  I intended to fill in the square on the top of the armour and put an icon there from the icon pack.  Not having any success right now.

Go and have a look at the icons on the web page.  They`re all nicely cut out for you aren't they?  Here's what they look like when you get them.


They're cast as part of these sprues.  The backing is about 1.5mm thick.  I tried to take that small icon off by filleting it with a fresh blade.  Wrecked it.  I'm now working on the large sword with a single wing that you see in the photo.  This is what it currently looks like from above and the side.


Awful! I'm gonna have to sand the heck out of this one to make it thin enough to look good. Strangely the oaths of moment (aka purity seals) fillet from the backing quite easily, as long as you're careful.  The larger icons are just shite. That is all. I sent a disgruntled email to FW about this, with pictures, asking for "better icons".  Given the current crisis with UK airspace, if they send them to me it might take a while.


UPDATE:
In a moment of clarity I put a piece of 60 grit sandpaper on my worktop and sanded the crap out of the excess resin.  Managed to get the thing to the right thickness.  Still - boourns!

Sunday, April 11, 2010

Paint! Or Die! Part 2.

I'm about a week behind, which really blows given the time I usually take to paint a model. Speedpainter I'm not.  We started decorating the downstairs of our house this week and as a result I had to disassemble my den.  Luckily, the basecoating I wanted to do involved the use of my airbrush, and I was able to do that today. It took me a couple of hours with the usual familial interruptions and a fat ginger tomcat whapping my chihuahuas across their noses. Such is the life of a Warhammer painter!

The last squad of Terminators I built with Thunder Hammers & Storm Shields were assembled from bits orders.  I used Forgeworld Deathwing pauldrons, and decided to pose them.  It'll make them interesting to paint, but I like a challenge.


This is a new take on painting Deathwing for me.  The two squads I have were done with many thin coats of GW Deneb Stone over Chaos Black primer.  I recently painted some Dark Angels Veterans for a tournament, and decided to try a different tack for the robes.  I started out with a base coat of GW Graveyard Earth, then went over that with a mix of Reaper's Desert Sand and Desert Khaki, washed with GW Gryphonne Sepia then highlighted with Reaper Desert Sand.  The result was quite pleasing, so I'm going for a similar affair for the Deathwing armour this time.


When I painted the Veterans' robes I wasn't in a hurry and needed to be a little precise in where the paint went so I brushed it on.  This time I cracked out the airbrush.  I thinned the GW Graveyard Earth down with a 50-50 mix of water and methyl hydrate.  The methyl hydrate sped up the drying time a little, which was good since I had made the mixture a little thinner than I normally would when airbrushing a basecoat.

Most of the Terminators are being painted with the arms off, just to make things easy.  Airbrushing that many arms individually would have cost me a lot in time and paint.  I wrapped some wide packing tape inside out around a couple of 2x4s and stuck the arms to those.  The Chainfists were converted with chainswords.  A couple of them blew off the 2x4 while I was blowing the paint over them but not too many to cause an issue.  Two coats each side, and Robert's your Father's Brother.

I had a spare bike kicking around so I blasted that with Graveyard Earth and this week - if my house is back together - I plan on experimenting to find out if I can get away with airbrushing the Desert Sand/Khaki mix over the Graveyard Earth, or if I need to take the old tank brush to the Terminators.

There's been grumblings (lol) among the POD... contestants? participants? that I don't have a troop choice, so today I ordered a Terminator torso and base, and I should be able to convert up a Belial with lightning claws.  Hopefully I can get it done in time.  I'll have to drop something from the list to make it playable.

Once I'm satisfied that the Terminators are ready for washing I'll airbrush the Ravenwing.  As you can see here I've assembled them with the Marines removable for painting.  Once the paint is finished they'll be glued in position.  As for the paint scheme I'm going out on a limb again.  When I painted some chaplain armour a while ago I basecoated with a 1:1 mix of GW Chaos Black and GW Adeptus Battlegrey, highlighted with Battlegrey, washed with Badab Black then some more highlighting with Astronomicon Grey. So I'll start with the Black/Grey mix in an airbrush.  Fingers crossed!